Blogs
Our community blogs
-
Low Light Lens
A blog by night_flyer_dji in Drone Racing- 1 Entry
- 0 Comments
- 0 Views
Personal drone flying experiences, equipment reviews, aerial photography projects, safety notes, and drone-related adventures.I picked up a DJI Mini 4 Pro back in the spring and for the first couple months I was just kind of flying around my neighborhood, checking out local parks, that kind of thing. Nothing serious. But I kept watching these YouTube videos of people doing these gorgeous slow reveals over mountain ridges and smooth push-ins toward buildings and I kept thinking — okay I want to do that. How hard can it be.
Turns out, pretty hard. At least for me.
The Plan That Wasn't Really a Plan
So I decided my first "real" cinematic project would be a short video of this old grain elevator about twenty minutes outside of town. It's got great textures, peeling paint, some rusted machinery around the base, and the surrounding fields are flat which I thought would be good for big wide shots. I'd driven past it a hundred times and always thought it looked cinematic. Good instinct, bad execution on my part.
My biggest mistake was not storyboarding anything. I just showed up with my drone, looked at the structure, and thought I'd figure it out on the fly. Ha. What I ended up with after three battery cycles was about forty minutes of footage that was mostly me hovering in one spot trying to decide what to do next, a bunch of shots where I started moving too fast, and honestly some clips where I just forgot to adjust my exposure before taking off so the sky was completely blown out.
The golden hour light was genuinely beautiful that evening. And I wasted most of it being indecisive.
What I've Learned About Planning a Shot List
After that frustrating edit session — or attempted edit session, I should say — I went back and actually studied some of the videos I'd been watching. Not just watching them for the pretty pictures but actually pausing and thinking about what move the pilot was doing and why it worked.
What I noticed is that good cinematic drone footage usually has a clear beginning, middle, and end to each individual clip. Like the shot starts with some kind of reveal or entry point, moves through space in a deliberate way, and ends somewhere meaningful. It's not just the drone going from point A to point B. There's intention behind it.
So now before I go out I actually write down shot ideas. Nothing fancy — I use the Notes app on my phone. I'll list maybe six to eight shots I want to get and what the movement should be. Something like: slow reverse pull-back starting low at ground level, elevator centered, rise to about 80 feet while pulling back 150 feet. That kind of thing. It forces me to think about the composition before I'm standing in a field squinting at my phone screen.
The Cinematic Mode Situation
One thing I did do right early on was switching to Cine mode on the Mini 4 Pro. If you haven't used it, basically it slows down the stick response so your movements aren't so jerky. It's like flying through honey compared to Normal mode. My initial footage before I found that setting looked like I was trying to swat a fly. Everything was twitchy and overreactive.
Even in Cine mode though I had to learn to actually slow down my inputs. The temptation is to push the stick and hold it and let the drone carry the shot. But what really works better — at least for me — is gentle presses, tiny corrections, letting the momentum do the work. I've been practicing on boring subjects just to train my thumbs to be more patient.
I also started using the ND filters I bought and kind of ignored for two months. ND16 in bright daylight has made a real difference. The motion blur in the footage feels more natural and the image just looks smoother overall. I was running with a 1/1000 shutter before because I was afraid of overexposure and the footage looked weirdly sharp and video-gamey. 180 degree shutter rule has become my religion now.
The Editing Side of Things
I edit in DaVinci Resolve because it's free and because I kept seeing people online say it's what the pros use for color grading. The learning curve is real. I'm still very much figuring it out.
For that grain elevator project I tried to salvage what I could. I ended up with maybe five usable clips out of everything I shot, and I cut them together with some music from Artlist that I subscribed to specifically for this. The final video is like 45 seconds long, which is embarrassing considering I was out there for almost two hours, but those 45 seconds actually look pretty decent. My wife said it looked "really professional" which okay she's biased but I'll take it.
One thing that helped the edit a lot was just being brutal about cutting anything that had even a tiny wobble or drift. If a clip isn't smooth it's gone, doesn't matter how cool the composition was. Smooth is everything in this style of video. People can forgive a lot but shaky aerial footage just looks amateurish and there's no fixing it in post.
Going Back Out This Weekend
I'm planning to go back to the grain elevator this Saturday morning — aiming for the blue hour before sunrise. I've got a shot list this time. Seven specific shots, each one with notes on the movement, approximate altitude, and direction relative to the structure. I've also been messing around in Google Earth to get a sense of where the sun will be rising relative to the building so I can plan for side lighting on the textured walls.
I know the second attempt won't be perfect either. There's a lot I still don't know about this stuff. But I feel like I at least understand now why my first attempt failed and that's something.
If anyone else is at this same beginner stage of trying to figure out cinematic flying, I'd really love to hear what's been working for you. Especially curious if other people are using any specific practice routines to improve their stick control, because that's still my biggest weak point. Drop something in the comments if you've got tips. I'll take all the help I can get.
-
Rotors & Rosin
A blog by Lisa Park in Drone Parts- 3 Entries
- 0 Comments
- 96 Views
Personal drone flying experiences, equipment reviews, aerial photography projects, safety notes, and drone-related adventures.Motors are one of those things that sounds simple until you start going down the rabbit hole. KV rating, stator size, stator height, magnet count, bell design ? it adds up fast and there's a lot of conflicting advice out there depending on who you ask. I spent probably four evenings just reading forum posts and watching teardown videos before I felt like I had a decent framework in my head.
What I Was Actually Building For
This is a 5-inch freestyle build, not a racer. I'm not trying to hit gate times or squeeze every millisecond out of a lap. What I care about is punch, smooth throttle response, and motors that won't cook themselves when I'm flying in August. I also run 4S because I've got a bunch of 4S packs that I'm not ready to retire yet, so that narrowed things down a bit.
The frame is a Diatone Roma F5 V2, which I picked up on sale. Five inch, roughly 225mm, pretty standard geometry. Nothing exotic. I figured with a solid budget frame I had more room to spend on motors without going completely over budget on the whole project.
Stator Size: The Part That Actually Matters Most
For a 5-inch freestyle quad on 4S, the general consensus is 2306 or 2207. Some people go 2306, some swear by 2207, and both camps have reasonable arguments. The first number is the stator diameter (23mm) and the second is the stator height. Taller stator means more copper, which generally means more torque and more heat dissipation area. On 4S freestyle, I landed on 2306 mostly because a few pilots I follow in the freestyle community use them and seem happy with the efficiency.
KV-wise, 2306 on 4S is typically in the 2400-2600 KV range if you're running 5-inch props. Lower KV with bigger props = more efficiency and less heat. Higher KV with smaller props = snappier response but runs hotter and eats packs faster. I went with 2450 KV as a middle ground. Didn't want to go too aggressive since I'm not doing race laps, just bashing around parks and open fields.
The Brands I Actually Looked At
I narrowed it down to three options. I'm not going to pretend I did some scientific comparison ? this was mostly reading reviews, checking build logs on Rotorbuilds, and asking in a couple Discord servers I'm in.
First was T-Motor F40 Pro IV. Well-regarded, smooth, lots of people use them. They're on the pricier end, like $22-24 per motor, and I'd need four obviously. For this build I was trying to keep motors under $80 total so that was already pushing it.
Second was XING2 2306 from iFlight. I've seen these in a ton of build logs and the price is better, usually around $16-18 each. The build quality on the ones I've seen in person looked solid ? good magnet retention, clean windings. A few people mentioned they're on the noisier side but that doesn't bother me at all.
Third option was some Brotherhobby motors that a guy in my local flying group runs. He raves about them constantly and his quad does sound pretty crisp. I looked them up and the Avenger 2306 model was in a reasonable price range. Less mainstream but not obscure.
I ended up going with the iFlight XING2 2306 2450KV. Mostly budget decision, partly because I found a good deal on a four-pack from an online retailer that brought them down to about $62 shipped. I'm not saying they're objectively the best, just the right call for where I'm at right now.
The Mounting and Wiring Part
Once everything arrived I spent a Saturday afternoon on the actual build. The Roma F5 V2 uses M3 screws for motor mounting, 16x16 and 30x30 stack mounting holes. Fairly standard. I did pre-tin the motor wires before I soldered them to the ESC pads, which I did NOT do on my first build and paid for it. Pre-tinning makes such a huge difference in getting clean joints without having to dwell the iron forever.
I use a TS80P iron with a fine chisel tip for most pad work. Temperature around 350?C for the motor wires, maybe up to 370?C for the thicker battery leads. I'm not a soldering expert by any stretch but I've gotten to where my joints look decent and don't fail ? which is really the only bar that matters.
One thing I messed up: I forgot to thread the motor wires through the arm channels before soldering them. Had to desolder one motor, thread the wire, and redo it. Annoying but not the end of the world. Write it on your hand if you have to ? thread wires first.
Bench Test Results
I did a brief bench test with props off before I buttoned everything up. Motors spin up clean, all four spinning the right direction (I'd set motor direction in BLHeli_32 beforehand, which is just a good habit). No weird oscillation, no cogging, temps felt fine after a 30-second high-throttle burst.
Full maiden is planned for this weekend if the weather cooperates. We've had a lot of rain lately and my usual flying spot turns into a mud situation that I'd rather not deal with. I'll do a follow-up post once I've actually put some packs through it and can give a real feel for how the motors perform in the air, not just on a bench.
What I'd Tell Someone Else Doing This
If you're picking motors for a similar build, just nail down your priorities first. Racing vs. freestyle matters. Battery voltage matters. How much you care about efficiency vs. raw punch matters. Once you know those things, the stator size and KV almost pick themselves. Don't let anyone tell you there's one perfect motor ? there are like fifteen motors that would work fine for a 5-inch freestyle build and the differences between them are way smaller than forums make it seem.
Also, buy from a reputable source and check that your motor shafts are actually straight before you mount them. I've gotten a bent shaft motor before (not on this order, thankfully) and it's a headache to catch after you've already soldered everything up.
More to come once I get some air time. Fingers crossed for a dry Saturday.
Recent Entries
-
Low and Fast with sky_ranger_42
A blog by sky_ranger_42 in Drone Reviews- 1 Entry
- 0 Comments
- 24 Views
Personal drone flying experiences, equipment reviews, aerial photography projects, safety notes, and drone-related adventures.Latest entry by sky_ranger_42,
Quick background: I flew a DJI Mini 2 for about a year before this. Loved it for photos, super stable, basically flies itself. But I kept seeing freestyle FPV clips and I just needed to try it. That "locked in" feeling people talk about where the quad goes exactly where your brain tells it to go. I wanted that. What I didn't fully understand was the learning curve involved.
The Simulator Phase (Don't Skip This)
I'll be honest, when people told me to spend serious time in a sim before touching a real quad I kind of half-listened. I downloaded Velocidrone and put in maybe four or five hours over a couple weekends and thought yeah okay I think I've got the basics. I could hover-ish, do wide turns, not crash constantly.
That was not enough. Not even close.
I've since gone back to the sim and I'm now at probably 25+ hours in it and the difference is huge. The muscle memory you build in Velocidrone directly translates to how you fly on a real quad. The physics aren't perfect but they're close enough that when I got back outside, my inputs stopped being panicked flailing and started being actual corrections. If you're reading this and you're where I was six weeks ago ? seriously, do more sim time. Your props and your bank account will thank you.
I'm using a Radiomaster Boxer on EdgeTX as my controller. Set it up in the sim first which was a little annoying to configure but there are good guides out there. The feel of flying with the actual sticks you'll use on a real quad matters a lot more than I expected.
The First Real Flights Were Humbling
My first real quad is a 5-inch built from a Diatone Roma F5 frame. I didn't build it myself, bought it from a local guy who was getting out of the hobby. It came pre-tuned and flashed with Betaflight 4.4 which was great because I had no idea what I was doing with tuning yet.
First time I armed it in an empty field and it immediately shot sideways and hit the dirt. Turns out I had my throttle trim off in the radio settings and also I was just panicking and overcorrecting. Broke a prop, checked everything over, replaced it, and went back at it.
Flights two through probably fifteen were me doing big lazy ovals trying to get comfortable. I had my rates set super low at first ? something like 400 degrees per second on roll ? which helped a lot. A lot of people come in with default rates that are just way too fast for a beginner. Lowering them made a huge difference for me. I could actually think about what I was doing instead of just reacting.
My goggles are Fat Shark Recon V3s. Budget pick, I know. The FOV is narrower than the higher end stuff and the DVR quality is rough but for learning on they've been totally fine. I'll probably upgrade eventually but for now they work.
The Crash Tax Is Real
I've broken probably eight or nine props, two sets of motor screws, and snapped one arm on the frame (that was a proper lawn dart, not my proudest moment). The arm repair was actually not that bad, ordered the replacement part and swapped it out in maybe forty minutes following a video. Betaflight configuration was still intact which was a relief.
Having a stock of 5-inch props on hand is just part of the deal. I buy them in packs of ten and I go through them faster than I expected. HQ 5x4x3 props have been my go-to so far. Nothing fancy.
I also dropped my goggles once while walking back to my car and cracked the lens cover. Learned to use a case. Lesson learned the cheap way thankfully.
Betaflight Is Intimidating But You Don't Need to Know Everything at Once
I was scared of Betaflight configurator for weeks. It looks overwhelming when you first open it. But I've learned that you really only need to understand a handful of tabs to get flying and make meaningful adjustments.
The ones I actually touch: Rates/Expo in the PID Tuning tab, the Modes tab to set my arming and beeper switches, and occasionally the Motors tab to verify motor order and direction. That's genuinely about it for where I'm at right now. PID tuning is a whole other rabbit hole I haven't gone down yet and I'm okay with that. The tune on this quad already feels decent for freestyle ? no obvious propwash in the turns I'm doing.
What I do want to learn next is adjusting expo on my rates. Right now my sticks feel a bit twitchy around center and I know that's an expo thing, I just haven't sat down and worked through it properly yet. That's on my list for this weekend.
Where I'm At Now
After a month and a half I can do consistent circuits of an open field, hold altitude reasonably well while turning, and I've started throwing in very basic split-S maneuvers. Nothing that would impress anyone who's been flying for more than a few months but compared to that first chaotic flight it feels like a completely different experience.
The thing that surprised me most is how physical it is mentally. Like after 20 minutes of focused flying I'm genuinely tired in a way I never was flying the Mini 2. Your brain is processing a lot. I've started capping my sessions at 3-4 packs (I have two 1300mah 4S lipos) and then calling it. More than that and my flying actually gets sloppier.
I've also joined a local FPV group that flies at a park with a designated RC area on Sunday mornings. Those guys have been incredibly helpful. One of them walked me through setting up my failsafe properly which I had configured wrong and didn't know it. Community stuff like that is worth seeking out.
Anyway that's probably enough rambling for a first post. I'll write something up specifically about the simulator stuff next time because I have a lot of thoughts on that. If you're just starting out or thinking about jumping in ? it's worth it, just go in with realistic expectations and some patience. And buy extra props.
-
Emma Flies
A blog by Emma Thompson in Drone Jobs- 1 Entry
- 0 Comments
- 36 Views
Personal drone flying experiences, equipment reviews, aerial photography projects, safety notes, and drone-related adventures.Latest entry by Emma Thompson,
So a little background. I got a DJI Mini 3 Pro last spring as kind of a gift to myself after a rough year. I always thought drones were cool but never thought I'd actually own one. I watched probably forty hours of YouTube before I bought anything, which in hindsight was both helpful and terrifying because you see so many videos about crashing and regulations and no-fly zones and you start to wonder if you're going to accidentally fly into restricted airspace on your first day and end up on some government list somewhere.
For the first few months I just flew by myself. Parks near my house, a field out by my sister's place, that kind of thing. I'd check the app every single time, almost obsessively, which I still do actually. I wasn't doing anything wrong but I also wasn't getting better very fast. And I had no one to ask questions to. I'd google stuff and get seven different answers and then just kind of guess.
Finding My Local Group (Sort Of By Accident)
The way I found my local flying club was genuinely embarrassing. I was at a park and saw two guys flying what looked like FPV quads and I stood there staring at them like an absolute weirdo for probably five minutes before one of them waved me over. Turns out they were part of a club that meets twice a month at a field about twenty minutes from me. They fly everything ? little Whoops, racing quads, cinematic stuff, people with Mavericks and Minis like me. I felt like I'd stumbled into a secret society.
I showed up to the next meetup not knowing what to expect and honestly a little nervous. There were maybe fifteen people there that day, ranging from a retired guy who's been flying RC planes since before drones were a thing to a college student who just got his first quad. And they were all just... nice? Nobody made me feel dumb for having beginner questions. I asked something embarrassing about what gimbal calibration actually does and instead of laughing at me, this one guy named Rick spent like fifteen minutes walking me through it with my actual drone in his hands.
That was kind of the moment I realized what I'd been missing.
What I've Actually Learned From Other Pilots
I want to be specific here because I think it's more useful than just saying "the community is great" in a vague way.
First thing ? ND filters. I had heard of them but thought they were optional luxury stuff. Someone at the meetup looked at my footage and immediately asked if I was using any filters. I wasn't. She explained the 180-degree shutter rule in a way that finally clicked for me after months of not fully understanding it. Bought a Freewell filter set the next week and the difference was immediately obvious. That's something I could have figured out eventually but having someone show me with side by side footage on their phone made it stick in a way that YouTube tutorials hadn't.
Second thing ? waypoints and automated flight paths. I had been doing everything manually and didn't realize how much of the Mini 3 Pro's functionality I was ignoring. Someone walked me through setting up a simple automated orbit shot that would have taken me forever to figure out on my own, or I would have never tried it at all.
Third thing ? honestly just confidence. Flying around other pilots, getting feedback, having someone spot for you while you try something you're nervous about ? it makes you braver in a good way. I attempted my first flight over water last month at a small reservoir the club has permission to use. I never would have done that alone. I would have been too scared of losing the drone. Having people around who've all dunked a quad at some point and lived to tell about it makes the stakes feel more manageable.
The Online Side Too
I also want to say something about online communities because they've been almost as valuable. I'm in a couple of Facebook groups and there's a subreddit I check pretty regularly. The quality of advice varies a lot ? sometimes you post a question and get twelve conflicting answers ? but if you learn which voices to trust, it's genuinely helpful. I've gotten good battery storage tips, found out about a local flying event I didn't know about, and once got really helpful advice about a specific error message my drone was throwing that turned out to be a firmware thing.
The one thing I'll say about online groups is you have to have thick skin sometimes. Occasionally someone posts something and the first five comments are people pointing out everything they did wrong. I try not to be that person. When I see a newer pilot posting footage or asking a beginner question, I remember how I felt standing in that park staring at those FPV guys, and I try to respond the way Rick responded to me.
If You're Flying Alone Right Now
I guess the main thing I want to say with all this is ? if you've been flying solo and feeling like you're not improving as fast as you want, or you're confused about stuff and too embarrassed to ask, please find your people. Look up the AMA (Academy of Model Aeronautics) club locator, search Facebook for local drone groups, ask in a subreddit if anyone knows of meetups in your area. A lot of clubs are really welcoming to beginners and the in-person experience of flying with others is something you really can't replicate by watching videos.
I'm still very much a beginner. My shots are inconsistent, I'm still working on smooth manual movements, and I have a lot to learn about editing. But I feel like I'm actually on a path now instead of just flying in circles (sometimes literally) and hoping I'm improving.
If you're in the Pacific Northwest area and want to know more about the group I fly with, drop a comment or reach out. Happy to share details. And if you have your own story about finding your drone community, I'd genuinely love to hear it in the comments. This stuff matters more than people probably realize when they're first starting out.
Thanks for reading my first real post on here. I'll try to write more regularly ? I have some thoughts on flying in different weather conditions that I want to get into at some point.
-
High Altitude Diaries
A blog by high_altitude_guy in Aerial Photography- 1 Entry
- 0 Comments
- 74 Views
Personal drone flying experiences, equipment reviews, aerial photography projects, safety notes, and drone-related adventures.I've been lurking on this site for a while and finally decided to start posting because I feel like this is something that doesn't get talked about enough for newer pilots ? not the sexy stuff like camera settings or flight modes, but just the boring, unglamorous habit of actually running a pre-flight checklist before every single flight. I fly a DJI Mini 3 Pro mostly, with some occasional time on a friend's Mavic 3, and everything I'm going to talk about applies pretty broadly to most consumer drones.
Why I finally started taking this seriously
About four months ago I was out at a local park, conditions were perfect, golden hour was coming up fast, and I was rushing to get in the air. I launched, got maybe 80 feet up, started my shot ? and then I noticed the gimbal was doing this weird stuttering thing. I brought it back down and realized I'd left the gimbal guard on. Just sitting right there on the camera the whole time. The footage was garbage and I wasted the best light of the day dealing with it. Embarrassing, and honestly that was a mild outcome. I've heard of people launching with ND filters on from a previous session that weren't appropriate for the lighting conditions, or worse, with props that weren't fully locked.
That was my wake-up call. I went home and actually wrote out a checklist. Took me maybe 20 minutes. And now I use it every single flight without exception.
What my checklist actually looks like
I broke mine into three sections: before I leave the house, when I arrive at the location, and right before takeoff. I'll walk through each one.
Before leaving the house: This is where I catch the stuff that ruins your whole day. I check that both the drone battery and the controller battery are fully charged. I also check my phone charge because the DJI Fly app drains it fast. I make sure the SD card is in the drone, because I cannot tell you how many times I've seen people post about flying an entire session and recording nothing. I check that I've got my prop guards or spare props in the bag if I'm going somewhere tight. And if I'm flying somewhere new I at least do a quick check on airspace using or the DJI Fly map to confirm I'm not rolling into controlled airspace without knowing it.
At the location: First I actually look at the sky and my surroundings. Wind, cloud cover, any birds in the area. I scope out where I'm going to stand, where my landing zone is, and whether there are any obstacles I need to be aware of ? power lines are the big one, they don't always show up obviously until you're walking the area. I also make sure there's nobody nearby who's going to be a problem, like kids running around right where I'm planning to land.
Right before takeoff: This is the detailed mechanical stuff. Props on and locked ? I physically spin each one and make sure it's seated. Gimbal guard off (learned that one). Camera lens clean, no smudges or condensation. Battery fully clicked in and secure. I power on the controller first, then the drone, wait for the connection to establish. I check the DJI Fly app for any warnings ? firmware updates pending, compass calibration needed, that kind of thing. I do a quick compass calibration if I'm in a new location or if the app is nagging me about it. Return to Home altitude is set appropriately for the area, which matters a lot if you're somewhere with trees or buildings. And I do a very short hover at about 3 feet for maybe 15 seconds before I actually fly anywhere, just listening to the motors and watching the drone's behavior. Any weird vibration or drift and I'm bringing it down to check before going further.
Some things I added over time
The first version of my checklist was pretty basic. I've added a few things since then based on things I've learned or mistakes I've almost made.
One is checking my obstacle avoidance settings intentionally. I used to just leave it on whatever it was from last session. But if you've been flying in a tight space with sensors set to brake instead of bypass, and then you go out to an open field and want to fly fast and low, those settings matter. Now I confirm them explicitly before every flight.
I also added a reminder to check the "max altitude" setting in the app. It defaults to 120 meters (roughly 400 feet, which lines up with the FAA recreational limit for most uncontrolled airspace), but if I'm flying in an area with a different authorized ceiling I need to adjust that. Worth a 5-second check.
Battery temperature is another one. In cold weather, especially below about 50?F, lithium batteries don't perform the same way. I've started hovering close to the ground for a couple minutes in cold conditions to warm the battery before climbing. The DJI app actually shows battery temp and will warn you if it's low. Don't ignore that warning.
How to actually build your own
I typed mine out in Google Keep so it's always on my phone. I've seen people print laminated cards which is kind of overkill in my opinion but hey if that works for you go for it. The format doesn't matter. What matters is that you actually use it consistently and update it when you learn something new.
If you're just starting out and don't know where to begin, check the manual for your specific drone first ? DJI and most other manufacturers include recommended pre-flight steps. Use those as a baseline and then add things based on your own experience and flying environment.
The whole checklist takes me maybe 3 to 5 minutes to run through. That's nothing compared to a ruined flight or a crash. And honestly once you do it enough it becomes automatic ? you're not even really thinking about it, you're just doing it, which is kind of the point.
Anyway that's my first real post on here. If anyone has stuff on their own checklists that I haven't mentioned I'd genuinely love to hear it in the comments. I'm still figuring stuff out like everyone else.
-
Up In The Air With Mike
A blog by Mike Thompson in FPV Drones- 1 Entry
- 0 Comments
- 88 Views
Personal drone flying experiences, equipment reviews, aerial photography projects, safety notes, and drone-related adventures.Pretty hard, it turns out. But also really fun, and I feel like I learned more in those two sessions than I had in the previous six months combined. So I wanted to write this up while it's still fresh because maybe it'll save somebody else some of the same headaches.
The Location and Planning Part
I drove out to a reservoir about 45 minutes from my house. There's a spot where you can park and walk down to a flat area near the water with some hills behind it. I'd actually scouted it on foot a few weeks before, which I'm really glad I did because it meant I knew roughly where I wanted to position myself and what direction the light would be coming from. I used the app PhotoPills to check where the sun was going to set and when golden hour would actually start. If you haven't used that app, seriously look into it. It's not free but it's worth it.
I got there about an hour and a half before sunset, which gave me time to set up and also just fly around and get a feel for the area. Wind was maybe 8 mph out of the northwest, pretty manageable. No other people around, which meant I wasn't stressing about flying over anyone.
Camera Settings ? Where I Went Wrong First
Okay so this is where I made my first dumb mistake. I had the Mini 3 Pro set to auto exposure because that's just how I'd been flying. I took maybe 20 shots and when I pulled them up later on my laptop they were all over the place ? some blown out, some weirdly dark, and none of them had that warm punchy look I was going for. Auto is fine when you're just flying around but for serious photography you really need to take control.
I went back out four days later and this time I switched to manual mode and shot in RAW. For the settings I ended up at ISO 100, f/2.8 (the Mini 3 Pro doesn't give you a ton of aperture options but f/2.8 is the widest), and then I adjusted shutter speed to get the exposure right ? ended up around 1/200 for most shots during golden hour. I also turned on the histogram overlay so I could actually see if I was clipping the highlights. That made a huge difference.
One thing I read before going out was about the 180-degree shutter rule for video, but for stills I was more focused on just keeping ISO low and not blowing out that sky. The sky during golden hour is doing all kinds of crazy stuff and if you let it blow out you've basically lost the shot.
I Also Tried an ND Filter for the First Time
I picked up a cheap set of ND filters off Amazon ? I think it was like a 4-pack with ND4, ND8, ND16, and ND64. I used the ND16 for most of the shoot. Honestly I'm not totally sure I needed it for stills in the way you need them for video, but I do think it helped me slow down the shutter a little and get a slightly smoother look on the water. The reservoir had some gentle ripples and with a slightly slower shutter you could see just a little bit of silkiness to it. Nothing dramatic but I liked it.
Putting on the filter was kind of nerve-wracking the first time because I was standing there trying to snap this little piece of glass onto my drone and I was terrified of dropping it or scratching the lens. It wasn't hard though, just a little fiddly.
Composition Stuff I Was Thinking About
I'm not a trained photographer or anything so I've just been reading and watching a lot of stuff online about composition. The main things I tried to do were use the rule of thirds (put the horizon on the upper third so you're showing more water and foreground), look for leading lines, and try different altitudes. I think the altitude thing is something people don't experiment with enough. I see a lot of drone shots that are all taken from like 200-300 feet and they all start to look the same. I tried some shots from maybe 80 feet and some from up around 350 feet and they feel totally different.
The lower shots felt more intimate I guess ? you could see the texture of the water surface and the rocks along the edge. The higher shots gave you more of that sweeping landscape feel with the hills in the background. Both were useful, just for different things.
I also spent some time just flying laterally and tilting the gimbal at different angles instead of just pointing it straight down or straight forward. Some of my favorite shots from the session were with the gimbal at maybe 45 degrees tilted down while I was slowly moving sideways. Kind of an awkward angle to think about but it gave an interesting perspective on the shoreline.
Editing in Lightroom
I use Lightroom Classic and this is where the RAW files really paid off. The JPEGs I had from my first session were pretty locked in ? not much you could do with them. The RAW files from session two I was able to really work with. I pulled the highlights down hard on the sky, brought up the shadows in the foreground, added some warmth and a little bit of dehaze. Nothing crazy, I'm not trying to make it look fake.
The colors during golden hour were already doing most of the work honestly. I just tried to make sure the edit matched what I remembered seeing when I was standing there.
What I'd Do Differently
A few things. I'd bring a jacket ? I was out there until after sunset and it got cold fast. I'd also bring a second battery because I used almost all of battery one just messing around during my first practice pass and then had to rush through the actual golden hour window. Also I'd get there even earlier and do a full test flight first so I'm not figuring out my camera settings when the light is already going.
But overall I'm really happy with how session two went. I got maybe five or six shots I'm genuinely proud of, which doesn't sound like a lot but for me at this point it felt like a big deal. I'm planning to head back out to the same spot in a few weeks and try it in different conditions ? maybe some cloud cover which I've heard can actually look amazing for this kind of shot.
If you're also kind of new to aerial photography and haven't tried golden hour yet, I'd really recommend just going for it. Even if your first attempt goes like mine did ? kind of sideways ? you'll learn a ton.
-
SkyPilot's Blog
A blog by SkyPilot in Beginner Drone Pilots- 3 Entries
- 0 Comments
- 746 Views
A personal beginner drone journey sharing first flights, mistakes, lessons learned, and what I wish I knew before becoming a drone pilot to help new flyers start right.
```htmlDrone interference represents one of the most critical challenges facing both recreational FPV pilots and commercial operators in today's increasingly congested electromagnetic spectrum. As the skies fill with more unmanned aircraft systems and our environment becomes saturated with wireless devices, understanding and managing drone interference has become essential for safe, legal, and successful flight operations.
Signal interference can transform a routine flight into a dangerous situation within seconds, potentially causing crashes, flyaways, or worse?collisions with manned aircraft. This comprehensive guide explores the technical aspects of drone signal loss, regulatory requirements, and proven strategies for maintaining reliable communication links in challenging RF environments.
What Is Drone Interference and Why It Matters
Definition of Drone Signal Interference
Drone interference occurs when unwanted electromagnetic signals disrupt the communication between a drone and its operator, affecting either the control link, video transmission, or GPS reception. This drone interference can manifest as degraded signal quality, complete signal loss, or erratic behavior in flight control systems.
The phenomenon encompasses several types of signal disruption:
- Control link interference affecting flight commands
- Video transmission degradation impacting FPV operations
- GPS signal jamming disrupting navigation systems
- Telemetry data corruption affecting flight parameters
Types of Interference: Signal Loss vs Signal Disruption
Understanding the distinction between complete drone signal loss and partial signal disruption is crucial for proper response protocols. Signal loss represents a complete communication breakdown, while signal disruption involves degraded performance that may still allow limited control.
Complete signal loss typically triggers fail-safe modes such as return-to-home (RTH) or controlled landing sequences. Signal disruption, however, may cause erratic behavior, reduced range, or intermittent control responses that can be equally dangerous if not properly managed.
Safety Risks and Potential Consequences
The safety implications of drone interference extend far beyond equipment damage. Uncontrolled aircraft pose risks to people, property, and other aircraft. In congested airspace, interference-induced flight path deviations can create collision hazards with manned aviation.
Common consequences include:
- Loss of situational awareness for the pilot
- Uncontrolled descent or flyaway events
- Collisions with obstacles or other aircraft
- Emergency landing in populated areas
- Regulatory violations and potential enforcement action
Legal Implications Under FAA Regulations
The Federal Aviation Administration takes drone interference seriously, particularly when it affects aviation safety or violates controlled airspace. Operators must understand their legal obligations regarding interference prevention and reporting requirements under current regulations.
FAA drone interference rules require pilots to maintain positive control of their aircraft at all times and operate in a manner that does not interfere with other aircraft operations. Violations can result in civil penalties, certificate actions, or criminal charges in severe cases.
Common Causes of Drone Signal Interference
Radio Frequency Congestion (2.4GHz and 5.8GHz Bands)
The most prevalent source of drone frequency issues stems from overcrowded ISM bands used by consumer electronics. The 2.4GHz band, shared with Wi-Fi, Bluetooth, and microwave ovens, experiences significant congestion in urban environments.
2.4GHz interference commonly affects control links, while 5.8GHz drone problems typically impact FPV video transmission. Both frequencies suffer from increasing congestion as more devices compete for limited spectrum space.
Key sources of RF interference include:
- Wi-Fi routers and access points
- Bluetooth devices and wireless peripherals
- Other drone operations in the vicinity
- Industrial, scientific, and medical equipment
- Cellular network infrastructure
Electromagnetic Interference from Power Lines and Electronics
Electromagnetic interference drones encounter near power infrastructure represents a significant operational hazard. High-voltage transmission lines generate powerful electromagnetic fields that can overwhelm sensitive receiver circuits and cause erratic flight behavior.
Electrical substations, transmission towers, and industrial facilities create complex electromagnetic environments that can disrupt multiple frequency bands simultaneously. This RF interference drones experience near power infrastructure often requires significant separation distances for safe operation.
Physical Obstacles: Buildings, Terrain, and Weather Conditions
Physical barriers contribute to signal degradation through reflection, absorption, and multipath effects. Dense urban environments create challenging conditions for maintaining reliable communication links, particularly for low-power FPV systems.
Terrain features, vegetation, and atmospheric conditions all influence signal propagation characteristics. Understanding these environmental factors helps operators predict potential interference issues and plan flight paths accordingly.
GPS Jamming and Disruption
GPS interference drones face can originate from intentional jamming devices or unintentional electronic emissions. GPS disruption affects critical navigation functions, including position holding, waypoint navigation, and return-to-home operations.
Military facilities, airports, and certain industrial operations may generate GPS interference as part of their normal operations. Pilots must be prepared for GPS-denied environments and understand backup navigation procedures.
Device Conflicts: Wi-Fi, Smartphones, and Other Drones
Modern flight environments often involve multiple electronic devices operating simultaneously. Smartphones, tablets, laptops, and other drones can create complex interference patterns that affect flight operations.
Multi-pilot operations require careful frequency coordination to prevent mutual interference. Even seemingly unrelated devices can create problems if they operate on conflicting frequencies or generate spurious emissions.
Environmental Factors Affecting Drone Signals
Urban vs Rural Flying Environments
The electromagnetic environment varies dramatically between urban and rural locations. Cities present dense RF congestion from multiple sources, while rural areas may offer cleaner spectrum but present other challenges such as terrain masking and distance limitations.
Urban drone interference typically involves multiple simultaneous sources requiring sophisticated mitigation strategies. Rural operations may encounter different challenges, including atmospheric effects and terrain masking that can cause unexpected signal loss.
Weather Conditions and Atmospheric Interference
Atmospheric conditions significantly influence radio wave propagation, particularly at higher frequencies used for FPV video transmission. Humidity, precipitation, and temperature inversions can create signal fading or enhancement effects that impact flight operations.
Precipitation static, temperature gradients, and atmospheric ducting can cause unpredictable signal behavior. Professional operators must consider meteorological factors when planning operations in challenging environments.
High-Voltage Power Lines and Electromagnetic Fields
Power transmission infrastructure creates intense electromagnetic fields that can overwhelm drone electronics. Corona discharge from high-voltage lines generates broadband interference across multiple frequency bands.
Safe separation distances from power lines serve dual purposes: preventing physical collision and avoiding electromagnetic interference. The required separation distance increases with voltage levels and atmospheric conditions.
Metal Structures and Signal Reflection/Absorption
Large metal structures create complex RF environments through reflection and absorption effects. These structures can cause signal shadowing, multipath propagation, and frequency-selective fading that affects different systems differently.
Buildings, bridges, towers, and industrial structures all present unique challenges for maintaining reliable communication links. Understanding these effects helps operators plan appropriate flight paths and operating procedures.
FPV Drone Signal Loss and Interference Solutions
Frequency Band Selection (2.4GHz vs 5.8GHz)
FPV interference management begins with proper frequency selection based on operational requirements and environmental conditions. Each frequency band offers distinct advantages and limitations that must be considered during system planning.
The 2.4GHz band provides better obstacle penetration and longer range but suffers from higher congestion levels. The 5.8GHz band offers more available channels and less congestion but has reduced range and obstacle penetration capabilities.
Key considerations for frequency selection include:
- Local spectrum congestion levels
- Required operating range and obstacle penetration
- Available channel options and coordination requirements
- Equipment compatibility and performance characteristics
Channel Management and Avoiding Overlap
Proper channel management prevents mutual interference between multiple drone operations. Understanding channel spacing requirements and potential overlap issues helps maintain clean communication links in multi-aircraft environments.
Channel coordination becomes critical during group flights or operations near other drone activities. Establishing clear communication protocols and frequency management procedures prevents interference-related accidents.
Antenna Positioning and Quality Considerations
Antenna selection and positioning significantly impact signal quality and interference susceptibility. High-quality antennas with appropriate gain patterns and polarization characteristics improve signal-to-noise ratios and reduce interference susceptibility.
Proper antenna installation includes consideration of mounting location, orientation, and protection from physical damage. Circular polarization often provides better performance in multipath environments common in urban operations.
VTX Signal Optimization Techniques
VTX signal problems can often be resolved through proper transmitter configuration and optimization. Power level adjustment, channel selection, and antenna matching all contribute to reliable video transmission performance.
Video transmitter optimization involves balancing transmission power, heat generation, and interference potential. Higher power levels may overcome some interference but can create problems for nearby operations.
FAA Regulations and Interference Reporting
Current FAA Rules on Interference and Aviation Safety
The FAA's approach to drone interference focuses on maintaining aviation safety while enabling legitimate drone operations. Current regulations require operators to maintain positive aircraft control and avoid interference with manned aviation.
FAA drone interference rules encompass several key areas:
- Positive control requirements throughout flight operations
- Immediate notification of interference affecting manned aircraft
- Equipment standards and certification requirements
- Operating limitations in high-interference environments
Reporting Unsafe Drone Operations to Flight Standards District Offices
When interference incidents occur, proper reporting procedures help the FAA identify systemic problems and develop appropriate responses. Flight Standards District Offices (FSDOs) serve as the primary contact point for interference-related reports.
Required information for interference reports includes location details, time and duration of interference, affected aircraft or systems, and any safety impacts observed. Accurate reporting helps build the database needed for regulatory improvements.
Penalties and Enforcement Actions for Interference Violations
FAA enforcement actions for interference violations can include civil penalties, certificate revocation, or criminal referrals depending on the severity and circumstances involved. Understanding potential penalties emphasizes the importance of compliance.
Enforcement factors include the degree of safety impact, operator knowledge and intent, compliance history, and cooperation with investigations. Preventive measures and voluntary compliance programs may reduce enforcement exposure.
Part 107 Requirements and Interference Prevention
Part 107 operations must incorporate interference prevention into their standard operating procedures. This includes equipment maintenance, pre-flight checks, and contingency planning for interference events.
Commercial operators often face higher scrutiny regarding interference prevention due to their professional status and potential impact on aviation safety. Documentation and training requirements reflect this increased responsibility.
Prevention Strategies and Best Practices
Pre-flight Interference Checks and Equipment Testing
Comprehensive pre-flight procedures should include systematic interference assessment and equipment verification. This process helps identify potential problems before they affect flight safety.
Effective pre-flight checks include:
- Spectrum analysis of the operating environment
- Range and signal quality testing
- Fail-safe function verification
- GPS signal strength and accuracy assessment
- Emergency procedure review and preparation
Proper Antenna Selection and Signal Boosters
High-quality antennas and signal enhancement equipment can significantly improve interference resistance. Professional-grade components often provide better performance and reliability than consumer-oriented alternatives.
Signal booster selection must consider regulatory compliance, heat generation, and potential interference to other operations. Proper installation and configuration maximize benefits while minimizing negative impacts.
Frequency Management and Channel Selection
Proactive frequency management involves ongoing monitoring of the RF environment and adaptive channel selection based on current conditions. This approach helps maintain optimal performance as conditions change.
Dynamic frequency selection capabilities allow systems to automatically avoid interference sources. However, manual oversight remains essential to ensure appropriate system behavior and regulatory compliance.
Flying Techniques for High-Interference Environments
Operational techniques can mitigate interference effects through flight path planning, altitude selection, and positioning strategies. Understanding interference patterns helps pilots avoid problematic areas.
Techniques for high-interference environments include:
- Maintaining line-of-sight when possible
- Using terrain masking to avoid interference sources
- Planning alternate flight paths and emergency landing sites
- Coordinating with other operators to minimize mutual interference
Firmware Updates and Equipment Maintenance
Regular firmware updates and equipment maintenance help ensure optimal interference resistance and system reliability. Manufacturers often release updates that improve interference handling and add new capabilities.
Maintenance schedules should include antenna inspection, connection verification, and performance testing. Documentation of maintenance activities supports regulatory compliance and troubleshooting efforts.
Troubleshooting Signal Problems During Flight
Identifying Interference Symptoms in Real-Time
Recognizing interference symptoms during flight enables prompt corrective action before complete signal loss occurs. Common symptoms include video breakup, reduced control responsiveness, and telemetry data errors.
Training pilots to recognize early interference warning signs helps prevent accidents and equipment loss. Regular practice with interference scenarios builds the skills needed for effective real-time decision making.
Emergency Procedures for Signal Loss
When complete drone signal loss occurs, predetermined emergency procedures become critical for safe aircraft recovery. These procedures should be thoroughly practiced and readily executable under stress.
Emergency response priorities include:
- Immediate notification of nearby aircraft if applicable
- Activation of appropriate fail-safe modes
- Movement to areas with better signal reception
- Preparation for emergency landing if necessary
Return-to-Home (RTH) vs Hover Mode Settings
Proper fail-safe configuration determines aircraft behavior during signal loss events. RTH modes attempt to return the aircraft to a predetermined location, while hover modes maintain position until signal recovery.
The choice between RTH and hover modes depends on operational environment, obstacles, and emergency landing site availability. Both modes have advantages and limitations that must be considered during mission planning.
Recovery Techniques for Lost Connections
Signal recovery techniques include repositioning the pilot, switching to alternate control methods, and coordinating with other operators for assistance. These techniques require practice and preparation for effective implementation.
Recovery success depends on understanding interference sources, having backup communication methods, and maintaining calm decision-making under pressure. Regular training exercises help develop these critical skills.
Advanced Solutions and Future Technologies
Adaptive Frequency Switching and Spectrum Management
Advanced systems incorporate adaptive frequency switching capabilities that automatically select optimal channels based on current interference conditions. These systems continuously monitor spectrum conditions and adjust parameters for optimal performance.
Cognitive
Recent Entries
-
New Drone Guy
A blog by New_Drone_Guy in Beginner Drone Pilots- 1 Entry
- 0 Comments
- 666 Views
New Drone Guy is a beginner drone pilot sharing first flights, lessons learned, gear discoveries, and simple tips to help new flyers start their drone journey with confidence.
Latest entry by New_Drone_Guy,
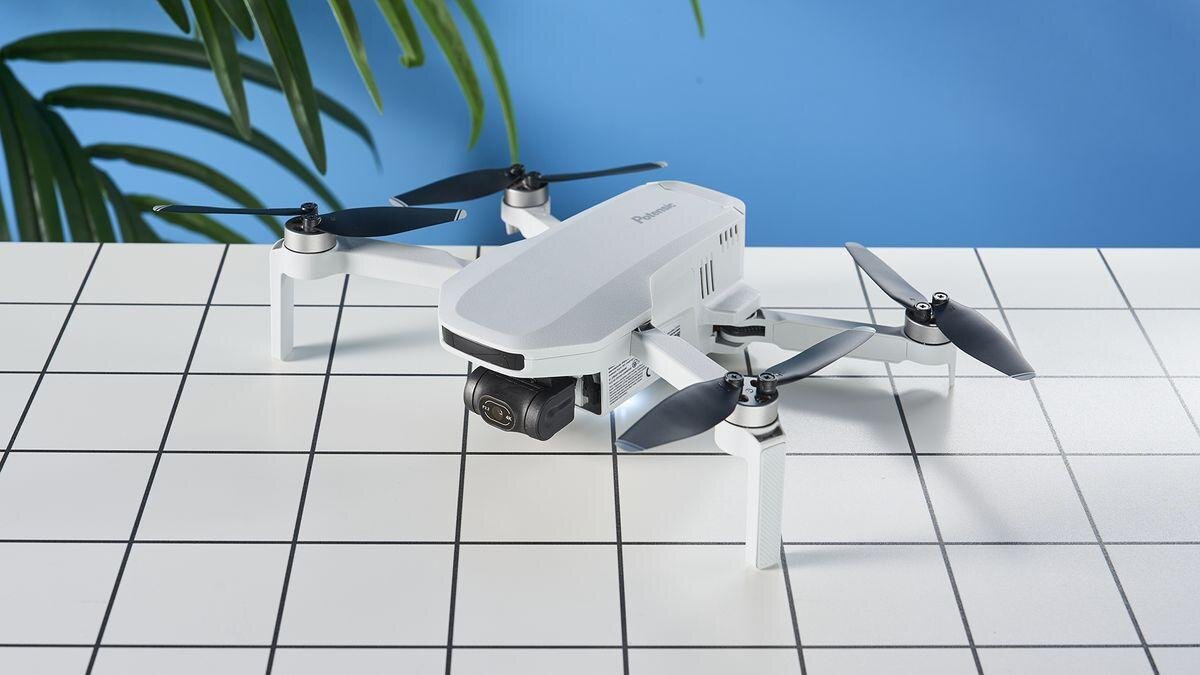
Is the?Potensic Atom?a Good First Drone? A New Pilot?s Honest Guide
Choosing your first drone can feel overwhelming?especially when you?re trying to balance price, features, and ease of use. The Potensic Atom (and its newer sibling, the Atom 2) has quickly become one of the most talked?about beginner drones thanks to its low cost, lightweight design, and surprisingly strong camera performance. But is it really the right choice for a brand?new pilot?
Let?s break down the real pros and cons so you can make a confident decision.
?
???Why the?Potensic Atom?Appeals to First?Time Pilots
1. It?s Lightweight and Doesn?t Require Registration (Recreational Use)
At?249g, the?Atom?and?Atom 2?fall under the FAA?s sub?250g category, meaning recreational flyers don?t need to register it. This makes it a stress?free entry point for new pilots.
2. Surprisingly High?Quality Camera for the Price
The Atom shoots?4K/30fps video?and?12MP stills, while the Atom 2 bumps up to?48MP photos?and?4K HDR video.
Reviewers consistently note that the image quality is?better than expected?for a budget drone.
This makes it a great starter drone for anyone wanting to capture travel footage, real estate shots, or hobbyist aerial photography.
3. Easy to Fly, Even for Total Beginners
Multiple reviewers highlight how simple the Atom is to control.
Stable flight
Beginner?friendly app
QuickShot modes for automated cinematic moves
Compact and portable design
Tom?s Guide even calls it ?a fantastic entry?level drone? very easy to fly.?
4. Excellent Value Compared to DJI
The Atom sits between the DJI Mini 2 SE and Mini 3 in terms of features?but at a much lower price point. TechRadar notes that it offers performance ?more commonly associated with pricier models.?
For new pilots who don?t want to spend $500?$800 on their first drone, this is a major win.
?
???Where the?Potensic Atom?Falls Short for New Pilots
No drone is perfect?especially at this price point. Here are the drawbacks you should know before buying.
1. No Obstacle Avoidance
This is the biggest downside for beginners.
No forward, backward, or downward sensors
You must rely entirely on your own awareness
Both TechRadar and Tom?s Guide list this as a major con.
If you?re nervous about crashing, this is something to consider.
2. Build Quality Is ?Just Passable?
Reviewers mention that the drone feels less durable than DJI models.
Not flimsy, but not rugged
Not ideal for flying in windy or rough conditions
Tom?s Guide specifically calls out the build quality as ?only just passable.?
3. Limited Ecosystem and Software Support
If you plan to grow into commercial flying, the Atom may hold you back.
No integration with AirData or professional logging tools
Fewer accessories and third?party add?ons
Less robust customer support compared to DJI
The Drone Girl review notes that commercial pilots should skip it for this reason.
4. Narrow Field of View (FOV)
The Atom?s camera has a narrower FOV than many competitors, which can make footage feel less cinematic.
5. No Collision Avoidance + Fixed Focus (Original Atom)
The original Atom uses a fixed?focus lens, which means:
Close subjects look sharper
Distant subjects may appear softer
TechRadar highlights this as a limitation.
?
???Quick Comparison: Potensic Atom vs. Atom 2 for Beginners
Feature
Weight
249g
249g
Photo Resolution
12MP
48MP
Video
4K/30fps
4K/30fps HDR
Flight Time
~25 min
25?27 min
Obstacle Avoidance
None
None
Price Range
$129?$276
$300?$520
Best For
Budget beginners
Beginners wanting better camera quality
?
?
???Should a New Pilot Buy the?Potensic Atom?
YES ? if you want:
An affordable, easy?to?fly first drone
Good 4K video without spending DJI money
A lightweight drone that avoids FAA registration
A simple, beginner?friendly flying experience
NO ? if you want:
Obstacle avoidance for safer flying
Professional?grade reliability
A drone for commercial work
The durability and ecosystem of DJI
?
???Final Verdict
The?Potensic Atom?is?one of the best beginner drones available today?for anyone who wants to learn to fly without a big financial commitment. It delivers impressive camera quality, stable flight, and excellent value. However, new pilots who want the safest possible flying experience?or who plan to grow into commercial drone work?may outgrow it quickly.
If you?re a brand?new recreational pilot looking for your first drone, the?Potensic Atom?is absolutely worth considering.
-
Drone Mapper
A blog by Drone_Mapper in Drone Mapping & Surveying- 1 Entry
- 0 Comments
- 624 Views
Drone Mapper is a drone mapping enthusiast sharing beginner?friendly tips, workflows, and real?world lessons from learning photogrammetry, surveying, and UAV mapping.
Drone mapping has become one of the fastest?growing and highest?paying sectors in the drone industry. As businesses across construction, agriculture, real estate, mining, and energy shift toward data?driven decision?making, the demand for accurate aerial maps and 3D models has skyrocketed. If you?ve been considering a career in drone mapping?or want to add mapping services to your existing drone business?this guide will walk you through everything you need to know.
This is a?comprehensive, SEO?optimized guide?covering certifications, equipment, software, workflows, accuracy standards, and real?world opportunities.
?
??What Is Drone Mapping? (Definition + Why It Matters)
Drone mapping is the process of capturing aerial images with a UAV and converting them into?geospatial data products?using photogrammetry or LiDAR. These outputs include:
Orthomosaic maps?(high?resolution, distortion?free top?down imagery)
3D point clouds
Digital Elevation Models (DEM, DSM, DTM)
Contour lines
Volumetric measurements?(stockpiles, cut/fill)
Vegetation indexes?(NDVI, GNDVI, VARI)
3D textured models?for planning and visualization
Drone mapping replaces expensive helicopter flights, manual surveying, and slow ground?based measurements. It delivers?faster, safer, and more accurate?data at a fraction of the cost.
?
???Why Drone Mapping Is a High?Value Career Path
Drone mapping is one of the most profitable drone services because:
Businesses already understand the value of aerial data
Mapping requires specialized skills (less competition)
Deliverables directly impact budgets, timelines, and safety
Many industries require recurring mapping (weekly, monthly, quarterly)
Average drone mapping project value:?$500?$3,500 per job depending on size, accuracy, and deliverables.
Top industries hiring drone mappers:
Industry
Why They Need Drone Mapping
Construction
Progress tracking, earthwork volumes, site planning
Agriculture
Crop health, plant stress, irrigation analysis
Mining & Aggregates
Stockpile volumes, pit mapping, safety
Real Estate Development
Land planning, 3D models, marketing
Utilities & Energy
Inspections, corridor mapping
Insurance & Roofing
Damage assessment, measurements
?
If you want a drone career with?consistent demand, mapping is the sweet spot.
?
????Step 1: Get Legally Certified (Part 107 in the U.S.)
To fly drones commercially in the United States, you must have an?FAA Part 107 Remote Pilot Certificate.
You?ll need to understand:
Airspace classifications
Weather (METARs, TAFs)
Drone regulations
Emergency procedures
Crew resource management
Radio communications
Once certified, you can legally perform mapping missions for clients.
?
????Step 2: Choose the Right Drone for Mapping
Not all drones are suitable for mapping. You need a drone with:
20MP+ camera
Mechanical shutter?(prevents rolling?shutter distortion)
Long flight time
RTK or PPK positioning?for survey?grade accuracy
Automated flight mission capability
Best Drones for Mapping in 2026
Drone
Best For
Notes
DJI Mavic 3 Enterprise (M3E)
Most users
Compact, RTK, 20MP mechanical shutter
DJI Phantom 4 RTK
Surveying
Legendary accuracy, still widely used
DJI Matrice 350 RTK
Enterprise
Supports LiDAR, multispectral, thermal
Autel EVO II Pro RTK
DJI alternative
Strong camera, good accuracy
?
If you?re starting out, the?Mavic 3 Enterprise?offers the best balance of price, portability, and accuracy.
?
????Step 3: Learn Drone Mapping Software (Flight + Processing)
Drone mapping requires two types of software:
1. Flight Planning Software
Used to automate grid missions with proper overlap.
DJI Pilot 2
DroneDeploy Flight
Pix4D Capture
Litchi Mission Hub
2. Photogrammetry Processing Software
Used to convert images into maps and 3D models.
Pix4D Mapper?? Survey?grade accuracy
DroneDeploy?? Easiest for beginners
Agisoft Metashape?? Extremely powerful
WebODM?? Free and open source
Learning how to process data is just as important as learning how to fly.
?
???Step 4: Master the Drone Mapping Workflow
A professional drone mapper follows a consistent, repeatable workflow.
1. Pre?Planning
Check airspace
Review weather
Plan flight altitude
Set front/side overlap (70?80%)
Identify obstacles
Plan ground control points (GCPs) if needed
2. Flight Execution
Fly automated grid missions
Maintain consistent altitude
Use RTK for high accuracy
Capture nadir and oblique images if needed
3. Data Processing
Import images
Align photos
Generate point cloud
Create orthomosaic
Build DEM/DSM
Clean and classify data
4. Deliverables
Depending on the client, you may deliver:
Orthomosaic TIFF
Contour lines
3D point cloud (LAS/LAZ)
DSM/DTM
Volume reports
Crop health maps
3D textured models
?
???Step 5: Understand Accuracy, GSD, RTK, and GCPs
This is where drone mapping becomes a real technical skill.
Key Concepts Every Drone Mapper Must Know
GSD (Ground Sampling Distance)?? Determines map resolution
RTK vs PPK?? Real?time vs post?processed accuracy
GCPs (Ground Control Points)?? Used for survey?grade accuracy
Overlap?? Ensures proper photogrammetry reconstruction
Coordinate systems?? EPSG codes, local grids, state plane
Accuracy reports?? RMSE, reprojection error, checkpoints
The more you understand these, the more you can charge.
?
???Step 6: Build a Portfolio and Start Getting Clients
Drone mapping clients want to see?proof of accuracy and quality.
What to Include in Your Portfolio
Sample orthomosaics
3D models
Volume reports
Before/after progress maps
NDVI crop maps
Accuracy reports
How to Stand Out
Offer fast turnaround
Provide clean, professional reports
Demonstrate accuracy with checkpoints
Use RTK or GCPs
Build a clean, modern website
?
???The Future of Drone Mapping (2026?2030)
Drone mapping is evolving rapidly. Expect to see:
AI?powered automated analysis
Real?time mapping directly from the drone
Swarm mapping missions
Higher?accuracy sensors
Digital twins integrated with BIM
Cloud?based processing with instant results
If you start now, you?re entering the industry at the perfect time.
-
Drone Guy
A blog by Drone_Guy in Drone Community- 1 Entry
- 0 Comments
- 785 Views
Drone Guy?s Blog delivers expert tips, guides, reviews, and real?world insights for drone pilots, beginners, and professionals looking to fly smarter and stay informed.
Latest entry by Drone_Guy,
Best Places to Fly a Drone: Incredible Locations Every Drone Pilot Should Experience
Flying a drone for the first time is exciting, but once you get comfortable in the air, you quickly realize that location is everything. The right place can turn an average flight into breathtaking footage. Wide open landscapes, dramatic coastlines, mountain peaks, and colorful city skylines can make even beginner drone pilots capture amazing shots.
If you are looking for the best places to fly a drone, this guide will walk through some incredible locations that drone pilots love. These locations offer beautiful scenery, wide open flying space, and stunning aerial photography opportunities.
Before flying anywhere, always make sure you follow FAA drone regulations, check for airspace restrictions, and respect local rules and privacy laws.
National Parks and Scenic Landscapes
One of the most breathtaking places to fly a drone is near natural landscapes. Mountains, canyons, waterfalls, and forests create incredible aerial perspectives that simply cannot be captured from the ground.
While many U.S. national parks do not allow drone flights inside park boundaries, areas just outside national parks often provide similar views with legal flying access.
Great landscapes for drone flying include:
Desert cliffs and canyon landscapes
Mountain valleys and alpine lakes
Waterfalls and river systems
Coastal cliffs and ocean viewpoints
Forest clearings and wilderness areas
Drone pilots love these locations because the elevation changes and dramatic terrain create stunning cinematic footage.
Golden hour, just after sunrise or before sunset, is especially perfect for drone photography in these areas.
Beaches and Coastlines
Beaches are one of the most popular places to fly a drone, and for good reason.
From above, the ocean creates beautiful textures and patterns that look amazing in aerial footage. Waves rolling toward the shore, surfers riding swells, and long stretches of coastline all make incredible drone shots.
Popular drone beach scenes include:
Turquoise tropical water
Rocky coastal cliffs
Sand dunes and barrier islands
Piers and lighthouses
Sunrise or sunset over the ocean
Flying over the water also gives pilots large open spaces with fewer obstacles, which makes flying easier for beginners.
Just be careful with wind conditions near the coast and avoid flying near crowded beaches.
Mountains and Scenic Overlooks
Mountain locations provide some of the most dramatic drone footage possible.
Launching from a high elevation overlook allows a drone to capture huge sweeping landscapes with deep valleys and layered ridgelines stretching for miles.
Some of the best mountain drone footage comes from:
Mountain passes
Scenic highway overlooks
Alpine lakes
Snow-covered peaks
Forest ridgelines
Drone pilots often use mountains to capture cinematic shots like slow reveals, valley fly-throughs, and panoramic landscape shots.
However, weather can change quickly in mountain environments, so always monitor wind and battery levels carefully.
Open Fields and Rural Farmland
For beginner drone pilots, open rural landscapes can be perfect practice locations.
Wide fields provide plenty of safe flying space and fewer obstacles such as trees, buildings, or power lines.
From the air, farmland also creates beautiful geometric patterns that look amazing in aerial photos.
Drone pilots often capture:
Colorful crop patterns
Tractors working fields
Sunsets across open plains
Farm buildings and barns
Rolling countryside landscapes
These areas are also excellent places to practice drone maneuvers like tracking shots, orbit shots, and cinematic flyovers.
Lakes and Rivers
Water creates some of the most visually appealing aerial footage because reflections and natural curves look incredible from above.
Drone pilots love flying around:
Large lakes and reservoirs
Meandering rivers
Waterfalls and rapids
Canoe and kayak areas
Boat docks and marinas
Flying low over calm water during sunrise or sunset can create mirror-like reflections that look stunning in drone photography.
Just remember to keep a safe altitude and avoid flying too close to the water surface unless you are comfortable with your drone controls.
City Skylines and Urban Landscapes
Urban drone footage can be incredibly dramatic when done legally and safely.
City skylines, bridges, highways, and architecture all look amazing from above. However, urban flying usually requires extra caution because cities often sit inside controlled airspace.
Drone pilots should always check airspace using apps like LAANC or B4UFLY before flying in any city environment.
Some of the most visually interesting urban drone scenes include:
Downtown skylines at sunset
Bridges crossing rivers
Busy highways with light trails
Waterfront cityscapes
Stadiums and large landmarks
Urban footage often works best during sunrise or sunset when lighting conditions are softer and shadows add depth to buildings.
Hidden Local Gems
Some of the best drone flying locations are places that most people overlook.
Local parks, small lakes, abandoned structures, and quiet countryside roads can all become amazing drone footage locations.
Many experienced drone pilots spend time exploring their region looking for:
Scenic backroads
Hidden waterfalls
Old barns and historic buildings
Wildlife areas
Remote hiking trails
Sometimes my best drone footage comes from locations that are close to home but rarely seen from the air.
Tips for Finding Great Drone Flying Locations
If you want to discover new drone locations, try these simple strategies:
Search Google Maps in satellite view to identify interesting terrain and landscapes.
Look for elevation changes such as cliffs, hills, and valleys that create dramatic aerial views.
Explore state parks and public lands where drone flying is allowed.
Use drone community forums where pilots share popular flight locations.
Pay attention to sunrise and sunset lighting, which dramatically improves aerial footage.
Final Thoughts
Drones give us a completely new way to experience the world. Whether you are flying over beaches, mountains, lakes, farmland, or city skylines, the sky truly opens up incredible photography and video opportunities.
The best places to fly a drone are locations that combine beautiful scenery with safe and legal flying conditions.
With the right location, even beginner drone pilots can capture footage that looks cinematic and professional.
The most important thing is to fly responsibly, respect regulations, and always be aware of your surroundings.
Once you start exploring from the air, you will quickly realize that there are amazing drone flying locations almost everywhere.
And sometimes, the best drone footage comes from simply launching your drone and discovering a view that few people have ever seen before.